Install & Optimize Your Mock Surveillance System with Dummy Cameras & Red Lights
Strategic placement of dummy cameras and red lights is key to creating an authentic mock surveillanc…….
Strategic placement of dummy cameras and red lights is key to creating an authentic mock surveillance system. Position cameras in high-traffic areas like entrances (at or slightly above eye level) for realism, aiming them at target areas with clear lines of sight. Integrate red lights around the cameras to indicate surveillance discreetly, deterring unwanted activities. Regular maintenance ensures the setup's integrity and realism, aiding security planning.
“Uncover the secrets to creating an immersive mock surveillance system with our comprehensive guide. Learn how strategic dummy camera and red light placement can transform any space into a realistic security setup. This step-by-step installation manual navigates you through the process, ensuring optimal results. Discover tips for efficient use and maintenance to keep your simulation secure and reliable. Elevate your practice or research with this practical approach to dummy camera red light placement.”
- Understanding Dummy Camera and Red Light Placement for a Mock Surveillance System
- Step-by-Step Guide to Installing Your Mock Surveillance Equipment
- Tips for Effective Use and Maintenance of the Dummy Camera and Red Light Setup
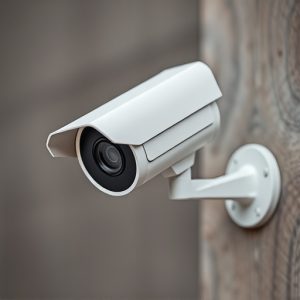
Understanding Dummy Camera and Red Light Placement for a Mock Surveillance System
When setting up a mock surveillance system, understanding the strategic placement of dummy cameras and red lights is paramount. Dummy cameras, designed to mimic real security equipment, are crucial for creating an authentic visual experience. Position them in areas that require monitoring—entrances, exits, high-traffic zones—to maintain the illusion of constant observation. This simple step enhances the realism of your mock system, making it more effective as a training tool or for theatrical purposes.
Red lights, when strategically placed around these dummy cameras, serve multiple purposes. They not only indicate the presence of surveillance but also add an element of suspense and mystery. By highlighting the camera’s location, red lights create a psychological effect, encouraging individuals to be mindful of their actions. This combination of visual cues—realistic camera positioning and distinct lighting—is key to creating a convincing mock surveillance environment.
Step-by-Step Guide to Installing Your Mock Surveillance Equipment
Installing a mock surveillance system can be a straightforward process with the right preparation and equipment. Here’s a step-by-step guide to help you get started, focusing on the key aspects like dummy camera placement and red light use for authenticity.
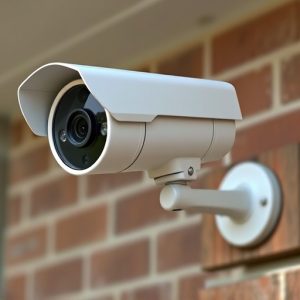
1. Select Suitable Locations: Identify areas that require monitoring, such as entry points, common areas, or valuable asset locations. Determine where your dummy cameras will provide the best coverage while maintaining realistic appearance. This might involve mounting them on walls, ceilings, or existing structures like poles.
2. Position Dummy Cameras Strategically: Place the dummy cameras at angles that mimic real surveillance equipment. Consider factors like line of sight and field of view to ensure they capture all necessary areas. For added realism, use a mix of indoor and outdoor cameras depending on your setup. The placement should be such that it’s obvious there’s surveillance but not too obtrusive.
3. Utilize Red Light for Authenticity: To enhance the effect, strategically place red lights around the dummy cameras. This is particularly effective in low-light conditions, making the cameras appear active and functional. Ensure the lighting is subtle enough to remain discreet while providing a clear signal of surveillance presence.
4. Connect Equipment and Test: Once the cameras are securely mounted, connect them to your recording device or central monitoring system. Test the entire setup to ensure video feed, audio (if applicable), and power connections are all functioning correctly. Adjust any settings as needed for optimal performance.
Tips for Effective Use and Maintenance of the Dummy Camera and Red Light Setup
When setting up a mock surveillance system with dummy cameras and red lights, strategic placement is key for maximum effectiveness. Position your dummy cameras at eye level or slightly elevated to mimic natural observation angles. Aim them towards areas you want to monitor, ensuring they have clear lines of sight. The red light should be placed strategically to indicate the presence of surveillance without revealing the absence of actual recording capability—a subtle yet powerful deterrent against unwanted activities.
Regular maintenance is crucial for preserving the realism and integrity of your mock surveillance setup. Keep the dummy cameras clean and free from obstructions that could impede their field of view. Replace any burned-out bulbs in the red lights promptly to maintain their glow. Periodically test the system to ensure all sensors, motion detectors, and alarms function as expected. This not only enhances the realism but also allows you to familiarize yourself with the system’s capabilities and limitations for better security planning.
Creating an effective mock surveillance system not only enhances security measures but also serves as a valuable training tool. By understanding dummy camera and red light placement, you can install a convincing setup with ease. Following our step-by-step guide and maintenance tips ensures optimal performance, making it an ideal solution for both professional and personal security needs. Remember, the strategic use of dummy cameras and red lights can significantly deter potential intruders while providing peace of mind.